Any seasoned water garden ponder will tell you that the highlight of their
pond are water Lilies. And if you are like me you will find colors, just like
fish, that draw and catch your attention. After careful planting you wait
patiently for the first leaves to appear. Then you begin to watch for that first
flower. Finally you see the first flower bud appear. And you wait for what seems
to be an eternity. Then one morning it happens. You walk out to the pond and see
that another Lily has come into bloom. Love is born!
In order to be successful you must first know your USDA zone and grow the
type of Lily that is hardy where you live. Water Lilies are in the family Nymphaeaceae and fall into two basic groups: Hardy and
Tropical. The tropical
group it divided between 2 groups, Day Bloomer and Night Bloomer.
|
|


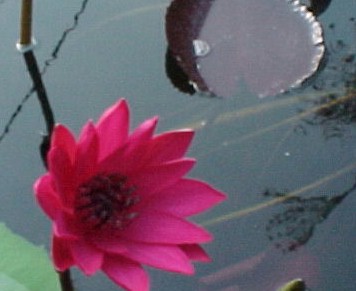
Above is 3 of my favorite hardy Lilies.
From left to right Colorado,
Almost Black and Pink Sensation
The water is much warmer at the surface and growth will begin much sooner
if the pot is NOT left at the bottom of the pond. As the water gets warmer and the spring
progresses you can then begin to lower the pot to a deeper depth. Once you move
the Lily to the bottom of the pond there is no need to worry about the leaves
that are under the water. Just like magic Lilies have the uncanny ability to
have their leaves grow to the surface of the water. Often this happens in less
than 24 hours!
Generally speaking hardy Lilies can go in the pond anywhere
from 12 to 24 inches deep for standard varieties. Dwarf varieties prefer to be
placed 6 to 18 inches below the water surface. Hardy Lilies are available in
colors of pink, yellow and white. And the shades can be anywhere from light to
medium to dark. Then within each color you can find colors like peach, orange,
and bi-colored. The flowers usually open in the morning hours and close in the
afternoon hours for several days in a row. Generally speaking the hardy Lily
needs a minimum of 6 hours of sunlight a day in order to perform well.
Hardy Lilies are hardy to zone 3. These Lilies spend the winter in the
bottom of the pond. Once the water begins to warm in the spring you can speed up
the process by removing the pot from the bottom of the pond to a few inches
below the surface of the water. Once you see leaves starting to emerge, push a
couple of pond tab fertilizer tablets into the soil near the outside edge of
the pot.
|
Tropical Lilies are broken down into 2 sub groups, those that bloom
during the day and those that bloom at night. The day bloomers will open mid
morning and close in late afternoon around 2 or 3 PM.
The night bloomers will
open in the early evening, around dusk and be close the next morning. If the
morning is cloudy and overcast the flower will remain open longer. The night
bloomers are very popular with the "working" crowd as they are usually
home from work to enjoy the blooms in the evening. If you are fortunate to be
home most of the time, then by all means you should have one of each kind!
Colors of tropical Lilies can be blue, purple, red, white, pink and yellow and
there are many shades of those colors. In tropical Lilies one can find colors
from sky blue to a deep purple-blue. Tropical Lilies have much showier leaves.
One favorite of mine is Leopardess. The green leaf with splotches of deep
burgundy is an awesome sight even when the plant is not blooming. And most
tropical Lilies are very fragrant. The most wonderful perfume comes from another
favorite of mine, Blue Beauty.
|
|
 Leopardess a day blooming tropical has huge leaves. See the US
quarter in the center of the leaf? Leopardess a day blooming tropical has huge leaves. See the US
quarter in the center of the leaf?
Even when not blooming the leaves put
on a great show. The lavender-purple flowers are a sight to behold. |
Antares a night blooming tropical has flowers as close to true red that you
will find. Wonderful burgundy foliage. |
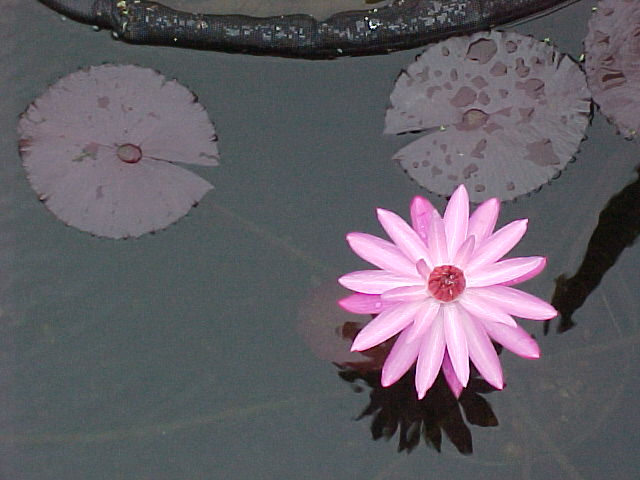 Sturtevanti is a wonder pink night bloomer with deep burgundy foliage. Sturtevanti is a wonder pink night bloomer with deep burgundy foliage. |
 Red Flare is also a night bloomer Red Flare is also a night bloomer
|
 I have had 7 open
flowers on my Blue Beauty at one
time. It is one of
the most popular day blooming tropical Lilies around. I have had 7 open
flowers on my Blue Beauty at one
time. It is one of
the most popular day blooming tropical Lilies around. |
| Unlike their cousin, the Hardy Water Lily, the Tropical Water Lily needs
to have, warm water. They are considered winter-hardy only in zone 8 or higher.
In these warmer climates they can reside in the pond all year round. Should you
have a brief "Cold" snap, you may have a temporary setback but don't
worry they will snap back as soon as the water warms again. They also require a
minimum of 6 hours of sun a day to grow and perform at their best.
Tropical Lilies can be grown successfully in zones lesser than 8 but one will
need to follow a few guide lines. Tropical Lilies should not be placed in
the pond until all danger of frost is past and when the water temperature is
above 70 degrees. I always grew a few tropical Lilies while I was living
in Michigan zone 5 because I was madly in love with them.
In colder zones many
treat them as an annuals. Grow them one season and then throw them away. You can
expect to pay around $30.00 for a tropical Lily, depending on where you live. Or
if you are budget-minded you can over winter them by lifting them from the pond
right about the time they go dormant. Trim off all foliage, buds and open
flowers and place them in a large bucket (a 5-galloon bucket works great) of
clean dechlorinated water and store them in a spot that is 55 to 70 degrees for
the winter. If you have a larger collection, purchase a large Rubbermaid tub,
one that will allow for several inches of water over the top of the pot. By
following this advice the Lily will go dormant and rest for the next season. Be
sure to check periodically during the winter to make sure the water does not get
funky or evaporate. If this happens, replace with clean water.
As spring
approaches move the bucket to a warmer, sunnier location to encourage the Lily
to break dormancy. For most zones this would be some time in March. Once you see
a few leaves, push a couple of pond tab fertilizer tabs into the soil near the
outside edge of the pot. By the time your water has warmed in the pond to
70 plus degrees you will have a plant with many leaves to add to your pond and
this will give you an early jump on the growing season.
TIP: when you remove the plant from the pond, remove any flower buds to a
vase of water and in most cases the flower will continue to grow and open. And
you can then enjoy the wonderful fragrance for few days in your home. Do not set
the vase in front of a sunny window or the flower bud may die prematurely.
Change the water in the vase daily as you would fresh cut flowers.
|
| Not sure if your Lily is hardy or tropical? Keep in mind that the leave
structures on tropical Lilies are different than hardy varieties. The leaves are
thinner and are serrated on the edges. The tuber is different looking also. The
Tropical Water Lily tuber is oval in shape and can vary in size from a small nut
to the size of a large egg, depending on the age of the tuber. Generally
speaking the pads are much larger than hardy Lilies and often quite showy. The
rhizomes of hardy Lilies are thick like a carrot and can be very long depending
on the age of the rhizome itself. The leaves on most hardy Lilies are more round
in shape. It is important to remember that each pad only lives a few weeks then it will
turn yellow, then brown and finally die. This is to be expected. Each type of
Lily
will continue to send up new pads to replace the older pads.
Keep the brown pads removed as well as the spent flowers. I have also found
it helpful to go into the pond periodically and remove excess healthy green
leaves. This will allow more sun to reach the crown of the plant and thereby
provide more flowers. While I do not overstock my pond with fish, I surely do
with Lilies because I have so many colors that I dearly love. And I can overcome
the crowding of the Lilies by removing healthy leaves on a regular basis.
|
Like most of garden plants Lilies have can have problems too.
|
Aphids are the
most common. Aphids can be several different colors, depending on the variety.
The simplest is to wash them off with a spray of water and they become food for
the fish. You will have to be persistent because if the fish do not eat them,
they will climb back up on the plant.
A few years ago I found a light spray of cooking spray of cooking oil like
Pam could kill them. Take care not to spray during the day as the sun will
magnify the oil and damage the leaves. Spray on a cloudy day or later in the
evening. It is very important to use a hose early the next morning and wash the
oil off the leaves before the sun hits them. You may see a light oil film on the
water and this is not any cause to worry. The oil will soon dissipate.
You can also purchase Malathion in your local garden center. You can use
either a hose end type sprayer or a pump type pressurized sprayer, either one
will work fine. Malathion is often used to treat flukes in the pond and it is
very safe to use on pond plants as long as you do not exceed the recommended
dosage of 2 cc’s per 1,000 gallons of pond water. It will dissipate in the water
so there is no need to worry about doing water changes. Usually one treatment is
all that is needed if the spray actually hit the aphids. The spray can be
repeated in a few days if you still find aphids are present.
|
| These critters leave a squiggly trail across the leave that is actually
between the layers of the leaf. This trail looks like some one took a pen and
drew a squiggly line into the leaf. The best method of dealing with leaf miner is to remove the leaf and destroy
it by burning or putting out with the rubbish. |
|


